
Automatic backups are essential for keeping your website and database data safe from unexpected issues, such as hacking attempts, accidental deletions, and server crashes. With automatic backups, you’ll have peace of mind knowing that even if something goes wrong, you’ll always have a recent copy of your website to restore.
Table of Contents
Features of cPanel Backup System
- Full Account Backups: Backs up everything within your cPanel account – files, databases, email accounts, DNS zones, and settings.
- Partial Backups: Allows backups of specific items like Home Directory files, MySQL Databases, and Email Forwarders/Filters.
- Automated Scheduling: Backup schedules can be set to Daily, Weekly, or Monthly (if supported by your hosting provider).
- Remote Storage Options: Saves backups locally on the server or sends them to a remote location, like an FTP server or cloud storage.
Step-by-Step Guide to Setting Up Automatic Backups in cPanel
Step 1: Log into Your cPanel Dashboard
Access cPanel:
Log into your hosting account’s cPanel dashboard.
Locate Backup Tools:
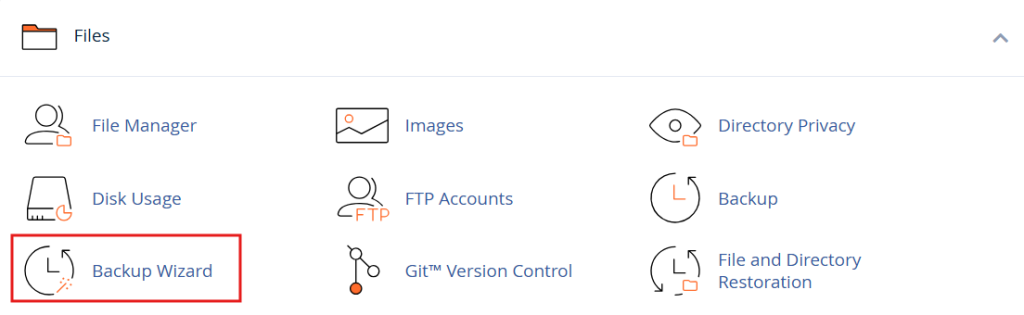
In cPanel, go to the Files section and look for either Backup Wizard or Backup (depending on your cPanel version and provider).
Tip: If you don’t see a Backup option, check with your hosting provider to ensure it’s enabled in your hosting plan.
Step 2: Configure Full or Partial Backups with Backup Wizard
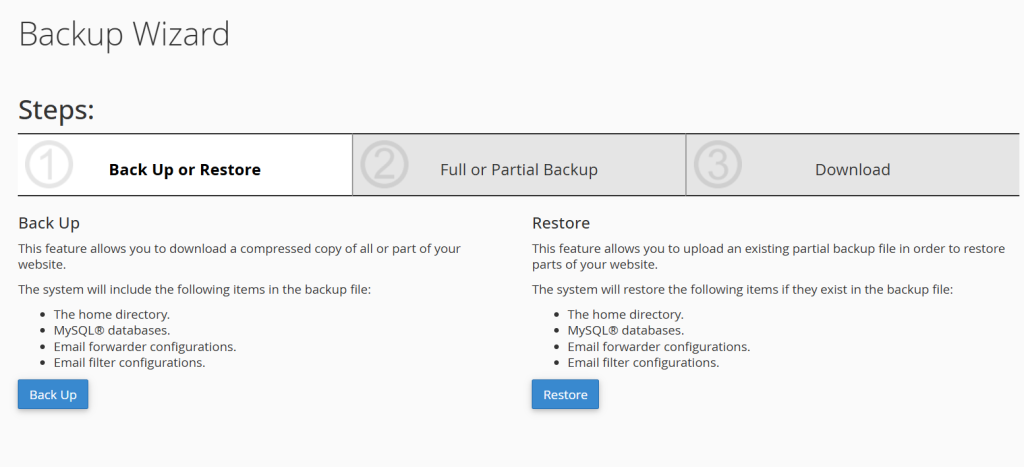
If using the Backup Wizard, follow these steps:
- Select Backup Type:
- Full Backup: This option includes all files, databases, email accounts, and settings in your cPanel account.
- Partial Backup: Allows you to back up specific components individually (e.g., just the database, home directory, or emails).
- Initiate Backup:
- For Full Backup, cPanel will prompt you to choose where to store the backup (e.g., Home Directory or a Remote FTP).
- For Partial Backup, select the item you want to back up and click the Download button.
Step 3: Set Up Automated Backup Scheduling (Using cPanel’s Backup Configuration Tool)
The Backup Configuration tool in cPanel lets you set up automated backups on a recurring basis if supported by your hosting provider.
- Open Backup Configuration:
- Locate Backup Configuration under the Files section (or ask your host if they offer backup scheduling).
- Choose Backup Frequency:
- Select Daily, Weekly, or Monthly backups, depending on your site’s update frequency.
- Define Retention Settings:
- Set how many backup copies to keep. For example, if you choose Weekly and set 3 Retentions, cPanel will keep three weekly backups at all times, overwriting the oldest backup with each new one.
- Backup Components:
- Choose between Entire Account (recommended for full protection) or select specific items to minimize storage usage (e.g., only databases or home directory files).
Step 4: Configure Remote Backup Storage
To increase data security, consider setting up remote storage for your backups. This protects against data loss due to server failures or other issues on your primary server.
- Choose a Remote Storage Option:
- Go to Backup Configuration in cPanel, and under the Remote Destination, you can configure options like FTP, SFTP, Google Drive,or Dropbox (availability varies by hosting provider).
- Enter Remote Storage Details:
- Provide the required credentials (such as FTP server address, username, password, and directory path).
- Test the Connection:
- Use the “Test Connection” feature to ensure cPanel can connect to your remote storage, preventing errors during backup uploads.
Tip: If you don’t see a remote storage option, contact your host for additional remote backup solutions.
Step 5: Verify Your Automated Backups
Once your automated backups are scheduled, it’s essential to verify that they are functioning correctly.
- Check Backup Logs:
- cPanel usually provides a Backup Log feature where you can review the status of each backup. Look for any errors or failed attempts.
- Download and Test a Backup:
- Occasionally, download one of your backups to check file integrity. Ensure your files and databases are intact by testing them in a development environment.
Restoring from Automated Backups in cPanel
If you need to restore your site from a backup, follow these steps:
- Go to Backup Wizard:
- In the cPanel Backup Wizard, select Restore to see the available restore options.
- Choose the Item to Restore:
- Select Home Directory, Database, or Email Accounts as needed.
- Upload Backup File:
- For manual restores, upload the appropriate backup file. For automated backups, cPanel may already have the files available for restoration.
Tip: Always check with your hosting provider to understand their restoration policies. Some hosts may limit the number of free restores or charge additional fees.
Best Practices for Managing Automated Backups in cPanel
- Choose a Frequency That Matches Your Site’s Activity:
- For dynamic sites (e.g., eCommerce or blogs with daily posts), daily backups are ideal. For static sites with infrequent updates, weekly or monthly backups may be sufficient.
- Monitor Disk Usage:
- Backups can take up significant space, especially if you keep multiple copies. Regularly check your Disk Usage in cPanel and adjust retention settings to prevent running out of space.
- Enable Database Backups for Critical Sites:
- If your site relies heavily on databases (like a CMS, eCommerce store, or forum), ensure the database is included in every backup.
- Use Multiple Backup Locations:
- Consider a mix of local and remote backups for added security. Some hosting providers offer multiple backup destinations for this reason.
- Check Backup Integrity Regularly:
- Download and test backups every month or quarter to ensure the files are valid and can be restored if needed. Testing helps prevent issues if a real restoration is ever necessary.
- Use Backup Plugins for Specific CMS:
- If you’re running a CMS like WordPress, Joomla, or Drupal, plugins such as UpdraftPlus, BackupBuddy, or Akeeba can provide additional options and flexibility for site backups, often allowing more granular control over scheduling.
Troubleshooting Common cPanel Backup Issues
- Backups Not Running:
- If scheduled backups aren’t happening, check with your host to ensure you have backup permissions and that your server meets the backup requirements.
- Disk Space Limitations:
- cPanel backups require sufficient disk space. Monitor your Disk Usage in cPanel and adjust your backup schedule or retention settings if you’re running low on space.
- Slow Backup Processes:
- Large sites with extensive media libraries or databases can slow down the backup process. Consider separating media files and database backups or scheduling backups during low-traffic hours.
- Backup File Corruption:
- Occasionally, corrupted backups can occur. Always test backup files by restoring them to a test environment to verify data integrity.
Conclusion
Setting up automatic backups in cPanel provides peace of mind and security for your website’s data. By configuring regular backups, setting up remote storage, and testing your backups periodically, you ensure that your website is always protected against data loss. Backups are one of the simplest yet most essential ways to safeguard your online presence, enabling quick recovery in the event of an emergency.